Let's get straight to it!
Waterglassing eggs has been a lost art but is still one of the best ways to preserve eggs. Why? They are shelf stable and the ingredients are low cost and accessible!
Once this method of preservation is complete, it's important that the eggs are rinsed before use. The shells will have a lime covering and rinsing helps rid this. Also worth noting, eggs kept in this fashion for a lengthy time (4+ months) will get a more fragile shell. They are not a suggested way to make hard boiled eggs as they shell may crack during the process. They are excellent for frying and baking.
Here you can see our beautiful multi-coloured eggs!

Supplies:
- Farm FRESH Eggs UNWASHED
- Calcium Hydroxide (Pickling Lime)
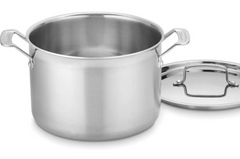
- glass containers for storage
- mixing spoons
- measuring cups
- kitchen weigh scale *a must*
- funnel
- water
- rubber gloves - optional
STEP 1: Collect Farm Fresh Eggs!
It's best to use same day eggs and they MUST be unwashed but clean. This ensure the pores of the shell are covered in the natural protective coating from the chicken: the bloom. Sometimes it gets a foggy appearance on the egg and but more often it's hardly visible, that's totally normal.
Commercial/grocery store eggs cannot be used for this as they are not super fresh and they have been washed.

STEP 2: Examine The Eggs
If the egg has anything attached to it you can gently remove a feather or piece of straw, but if there is manure stuck to it then that is best to wash and use immediately.
Check for any holes, fragile shells or cracks on the egg as they cannot be used. You could also candle the eggs at this time to check for blood spots but I personally don't do this and I examine that when I crack my eggs for us. I do this by cracking them into a separate small bowl and then adding one egg at a time to whatever I'm cooking.
Check out this visible bloom on the egg below! You can see the water marks showing the brown under colour of the egg and the almost foggy white appearance on the dry areas. This is a more obvious example to show you and it's simply for knowledge attainment. Reminder: do not wash the eggs!

STEP 3: Place Eggs in Jar
Pretty straight forward. Gently place eggs into the container you are using. It will need a secure lid so an old 4L pickle jar works really well.
I add my eggs to the jar first so that I don't have to submerge my hand in the lime solution. It's not wildly dangerous but it does dry out your skin so the lease amount of interaction with it the better.
STEP 4: Mix Lime Solution
I use a large glass measuring cup to mix my solution and water and then I gently pour it into the egg jar.
To do this, use the weigh scale to zero it with a small dish on top. Add 1oz (by weight) Calcium Hydroxide to 1 quart water. Stir together until combined. Once sitting, this will separate and the white will settle to the bottom and on top of some eggs. This is normal. If using a large jar like a 4L pickle jar, you may need to double or even triple the batch. This will depend on the size of your eggs and the space they take up. I found just over 2x this recipe has been required.
STEP 5: Storage
CONGRATS! You have preserved abundance for the winter months! Eggs are seasonal and it's important to use strategies for food security when food is in season, just as you might can peaches or make apple sauce to store away.
Store your containers in a cool dark place, like a root cellar. If you don't have a cellar, a cold closet, basement shelf or shed pending it doesn't freeze in the winter.

STEP 6: Eat
I have used eggs that were 12 months stored. The shells were thinner and more fragile but they worked exactly as intended and helped us get through the cold winter when our hens stopped laying as frequently. Ensure you rinse them before cracking them to reduce lime contamination and taste with your recipe.
Summary
I hope you enjoyed learning something new or finding a different way to preserve your food.
Don't forget to follow our social media pages and subscribe to our newsletter via the home page of our website wholesomepastures.ca
If you tried this, let me know how it went!